I didn’t plan to fall in love with a wine bottle garden border, but it happened fast. One minute I was holding an empty bottle like “recycling day,” and the next minute I’m staring at my yard thinking, wow… that could be cute. Also slightly weird. In a good way though.
What surprised me is how a line of bottles can make a messy bed look organized, like it has rules and manners. And the best part is it’s not perfect, it’s got personality. Like me when I try to act like I’m “a garden person” but I’m still learning.
Table of Contents
Wine bottle garden border : the neat bottle line on top of a stone wall
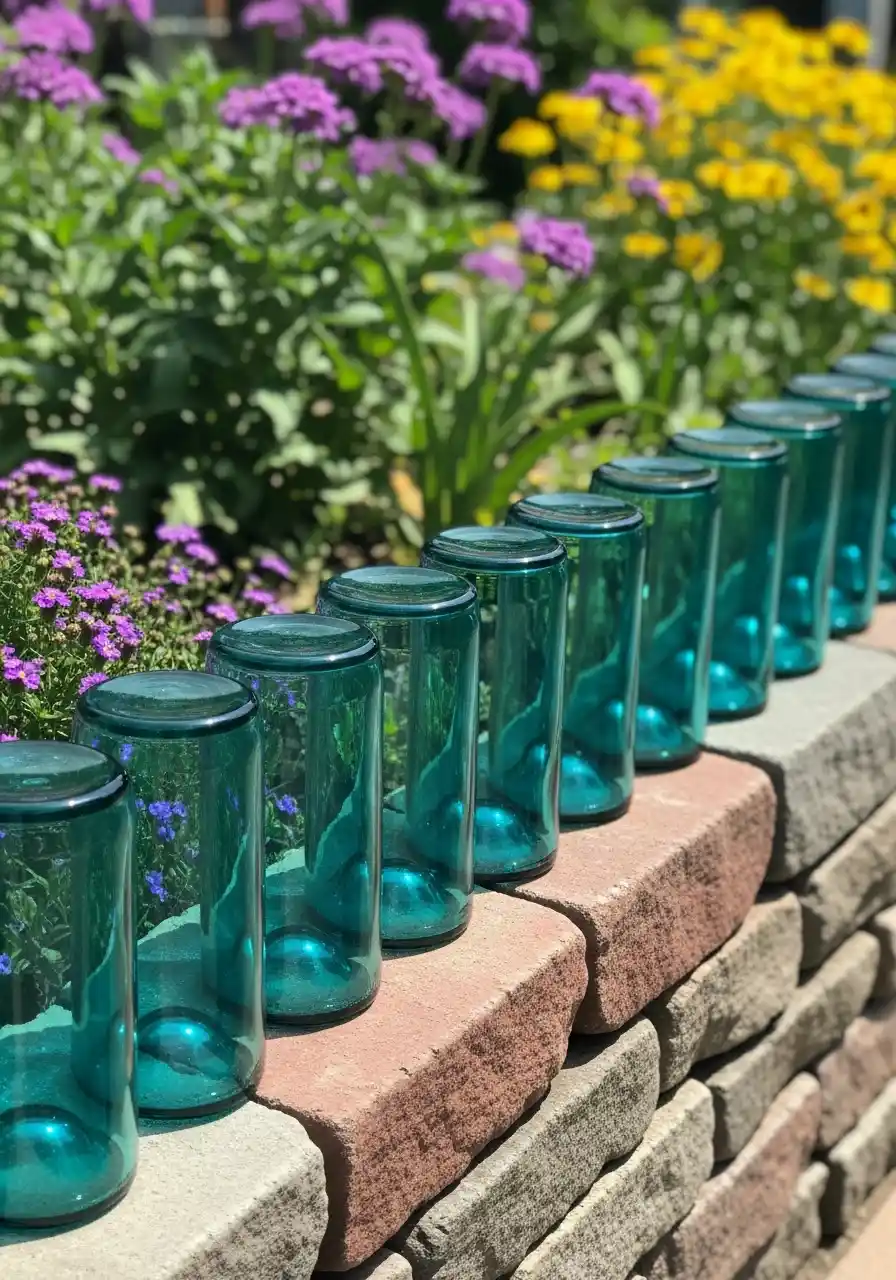
This look is so clean it almost feels fancy. The bottles are flipped upside down and lined up on a flat stone cap, like little glass soldiers. I like how the teal glass catches the sun and throws that soft color onto the stones. It’s calming but still interesting, which is hard to pull off.
If you try this, the trick is making the base stable. A stone wall cap or a flat ledge is perfect. If you don’t have that, you can do a narrow strip of concrete or packed gravel behind your bed edge. The bottles need a solid “seat” so they don’t wobble every time a squirrel sneezes.
I’ll admit, I’m picky about spacing here. I want the gaps even. When it’s uneven, my brain notices and gets annoyed for no reason. So I’d lay them out first, adjust, then commit.
Heart-shaped bed edged with dark bottles
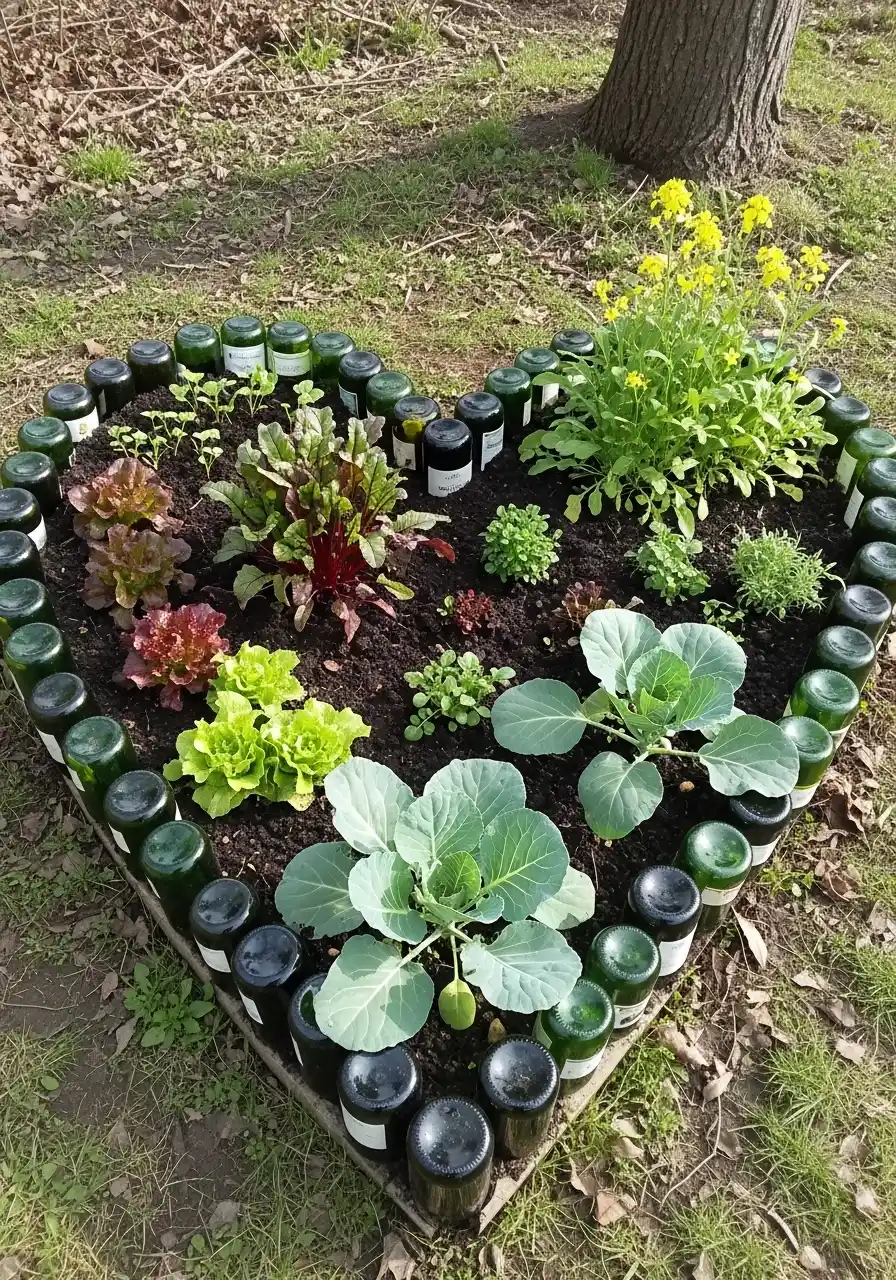
This one is sweet, like a little garden love letter. The heart shape is clear, and the dark green bottles create a bold outline so you can see it from far away. I also like the mix of veggies and flowers inside. It’s not just “pretty,” it’s useful too.
A heart border is harder than a straight line, not gonna lie. But bottles actually help because you can curve them by turning each bottle a tiny bit. It becomes a flexible bottle garden edging, not stiff like big bricks.
My advice is to mark your shape first with a rope or flour. Then dig a shallow trench for the bottle bottoms so they sit at the same height. If some bottles sit higher, it looks like missing teeth. Still cute, but not the vibe I want.
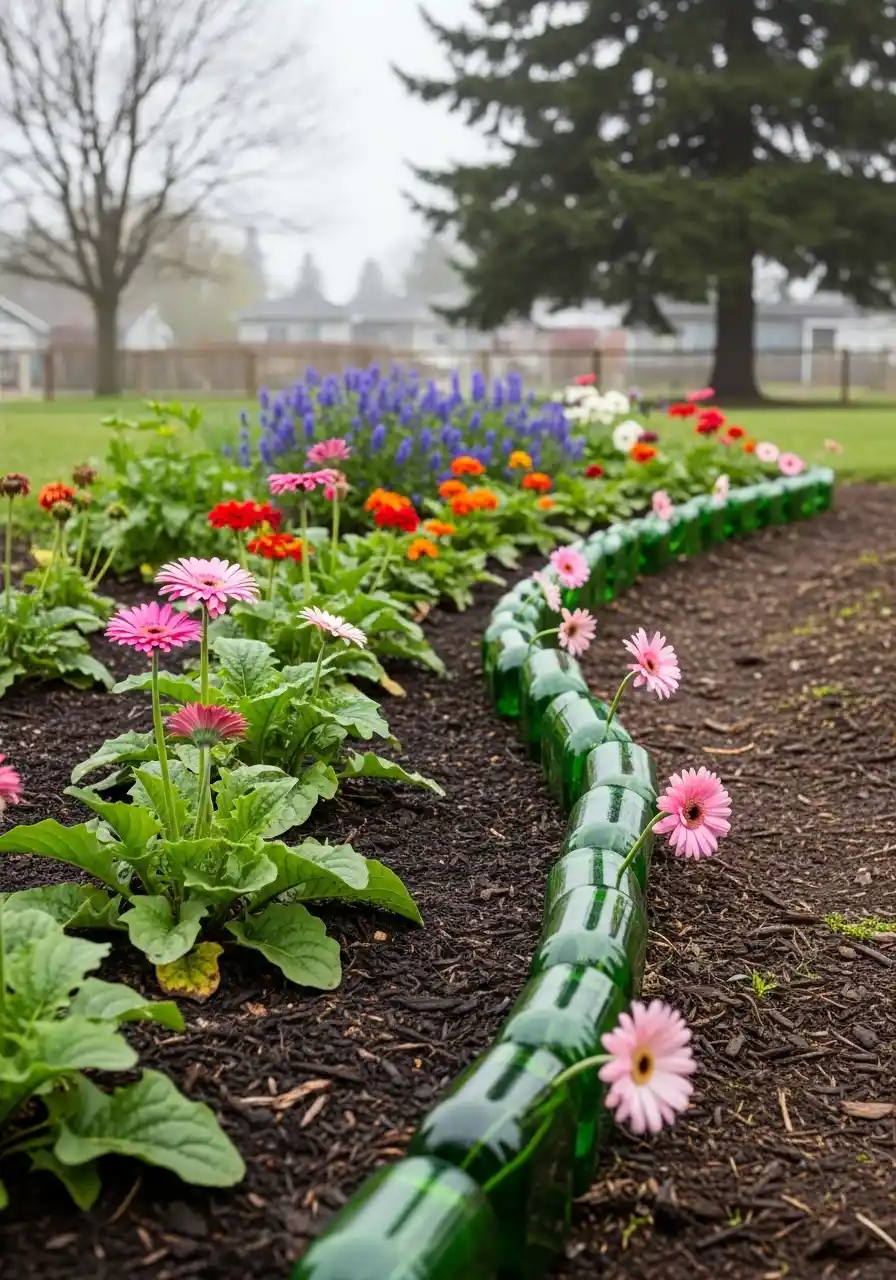
Winding pebble path with bottle edging on both sides
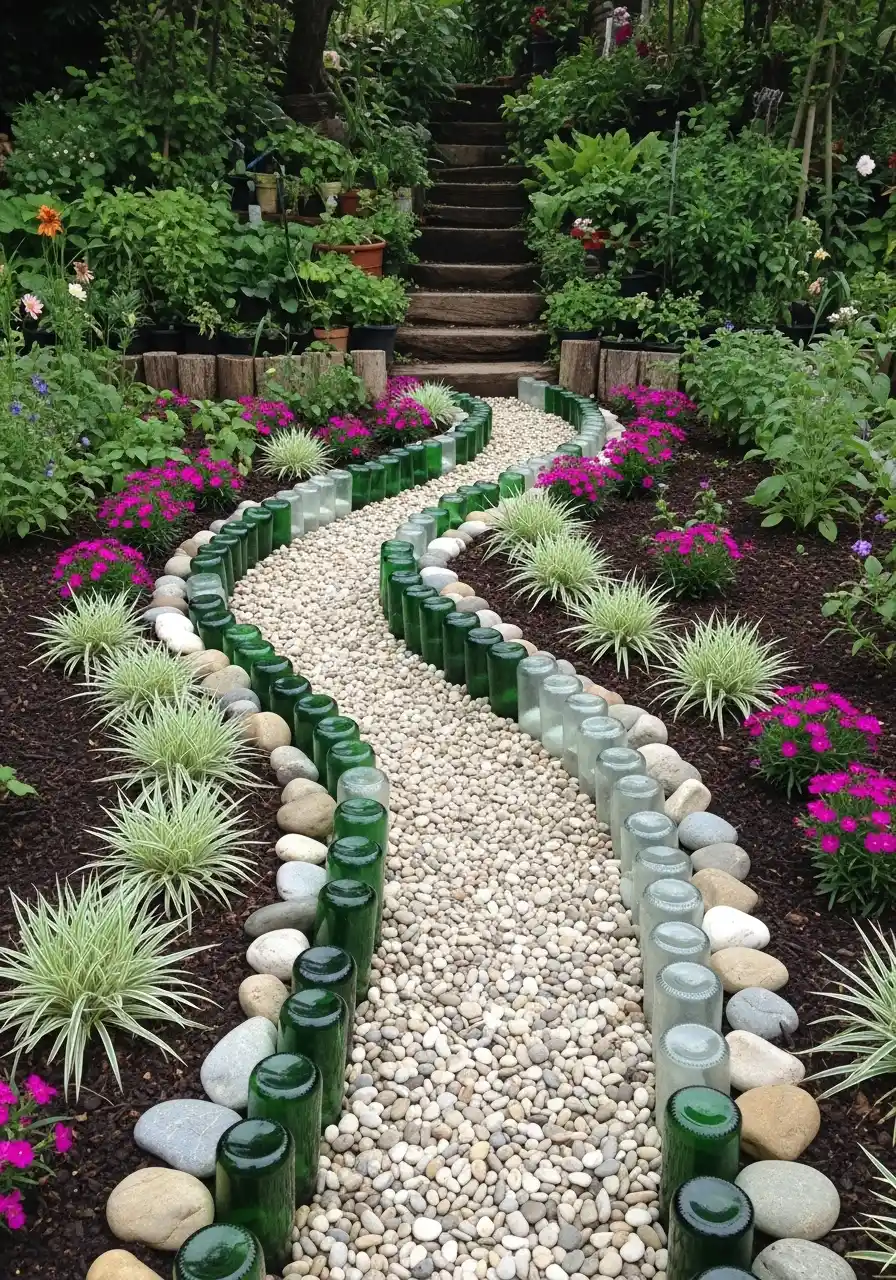
This one is my favorite “storybook path” look. The path is filled with small pebbles, and the bottle border snakes along both edges like a green and clear ribbon. It looks planned, but also playful. Like the garden is leading you somewhere.
If you’re building something like this, do landscape fabric under the pebbles. I learned that the hard way. Without fabric, weeds pop up and act all confident, like they pay rent. Also, use bigger stones along the outside to hold the pebbles in place, then line the bottles just inside that.
This kind of glass bottle garden border works best when the curve is gentle. Sharp turns make bottles tilt and look stressed out. Give your curves space, and it’ll look smoother.
Rainbow bottle row for loud, happy color
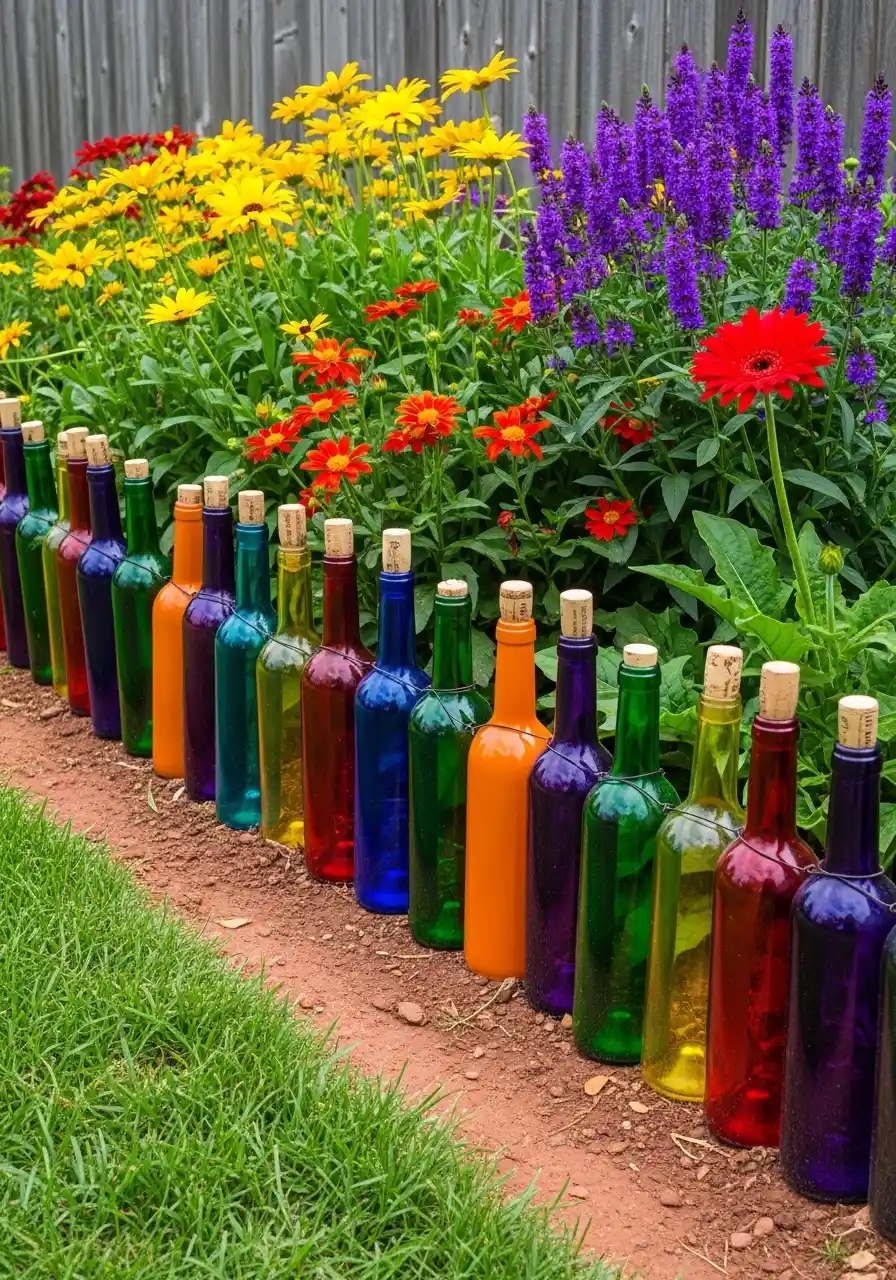
Okay this is the fun one. A line of bright bottles in different colors is basically instant personality. It feels like a party, even if you’re just watering plants in old socks. The corks on top are smart too, because it keeps dirt and bugs out of the bottle necks.
If you do a colorful bottle border, group colors in a pattern. Like warm colors together, then cool colors together, then repeat. Random can work, but it can also look like a recycling accident. A little pattern makes it feel intentional.
One warning: colored bottles fade sometimes if they’re painted. So if you paint them, use outdoor spray paint and a clear sealer. Or accept that fading happens and pretend it’s “vintage.” That’s what I do.
Bottle edging mixed with smooth river rocks
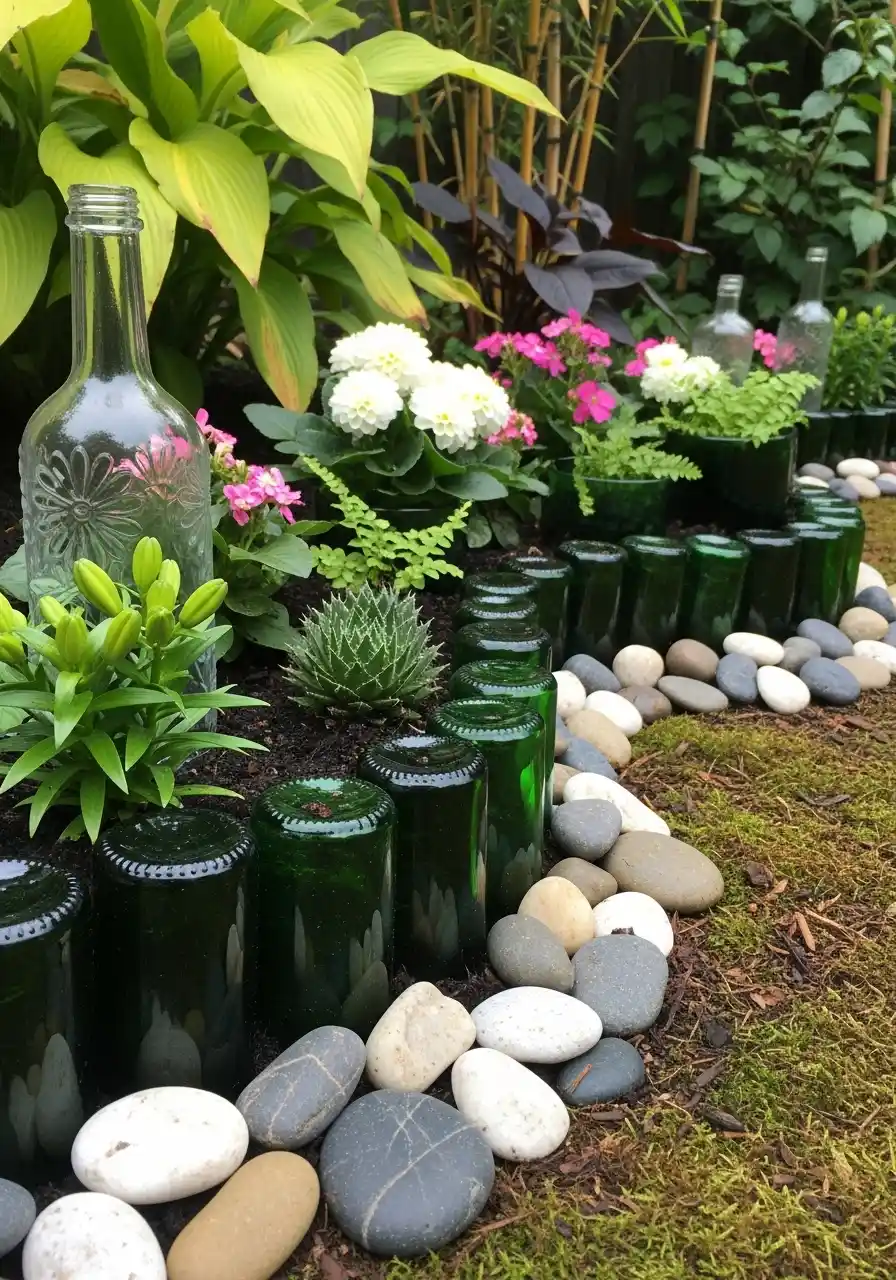
This combo feels peaceful and tidy. The dark bottles make a strong line, and the rounded stones soften everything so it doesn’t look harsh. It’s like the bottles are doing the structure work, and the rocks are doing the pretty work.
This style is also good if your lawn edge is messy. The rocks create a buffer zone, so mulch doesn’t spill into grass as much. And the bottle garden border keeps the rocks from wandering around. Rocks love wandering, it’s weird.
My little hack: put the stones on the outside (lawn side) and bottles on the inside (bed side). That way the mower wheels bump stones, not bottles. Because yes, I have bumped bottles before. It hurts my feelings.
“Secret courtyard” path with bottle edging and a focal wall
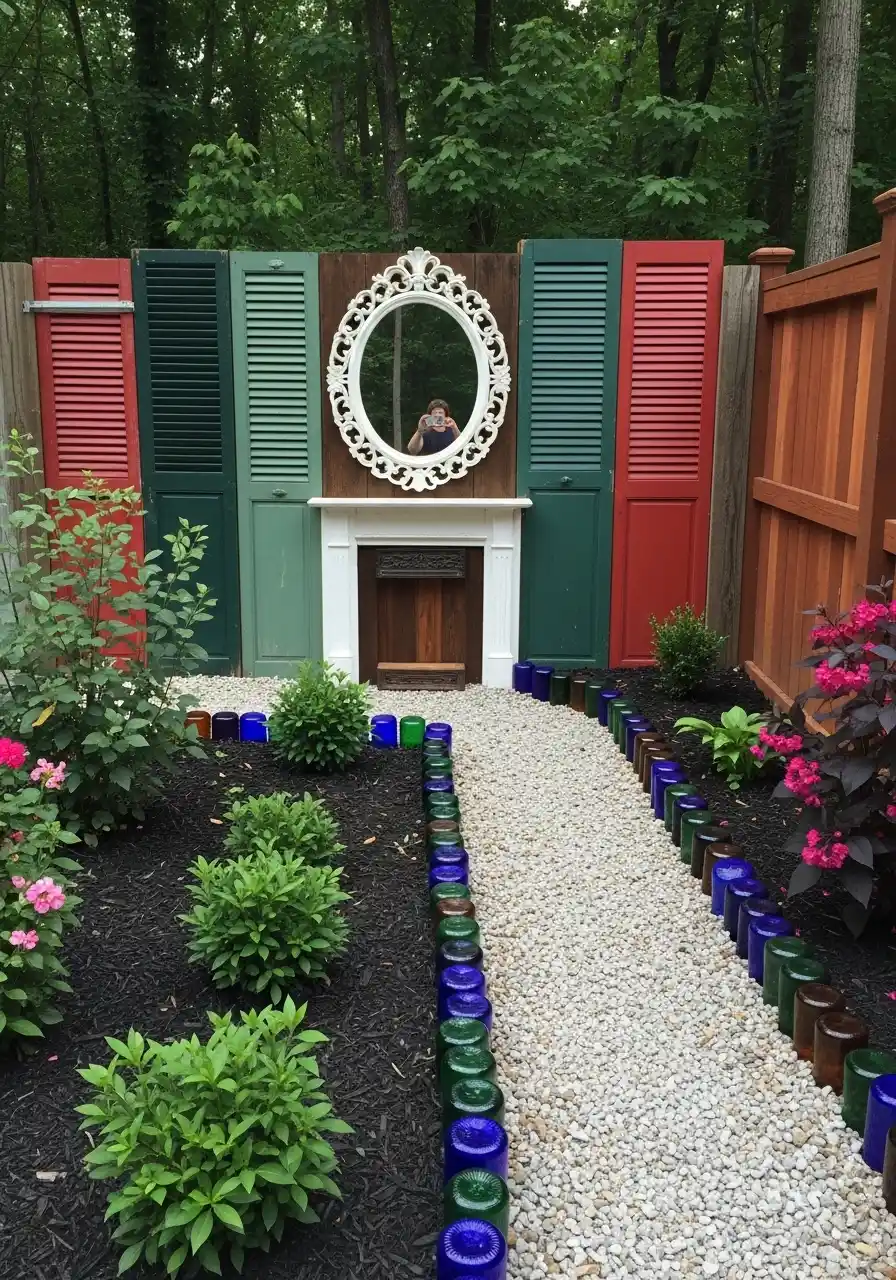
This setup is so charming. The bottle border frames a gravel walkway, and at the end there’s a dramatic wall with shutters and a mirror. It feels like a hidden garden room, like you’re supposed to whisper in there. I love that.
If you want this effect, the border matters because it guides the eye straight down the path. A recycled bottle border is perfect here because it adds color without adding clutter. Plus it’s low enough that it doesn’t block plants.
Also, the mirror trick is kinda genius. It makes the space feel bigger. Just place it where it reflects plants, not your trash bins. Trust me on that one.
Bottle “cap view” border along a raised bed
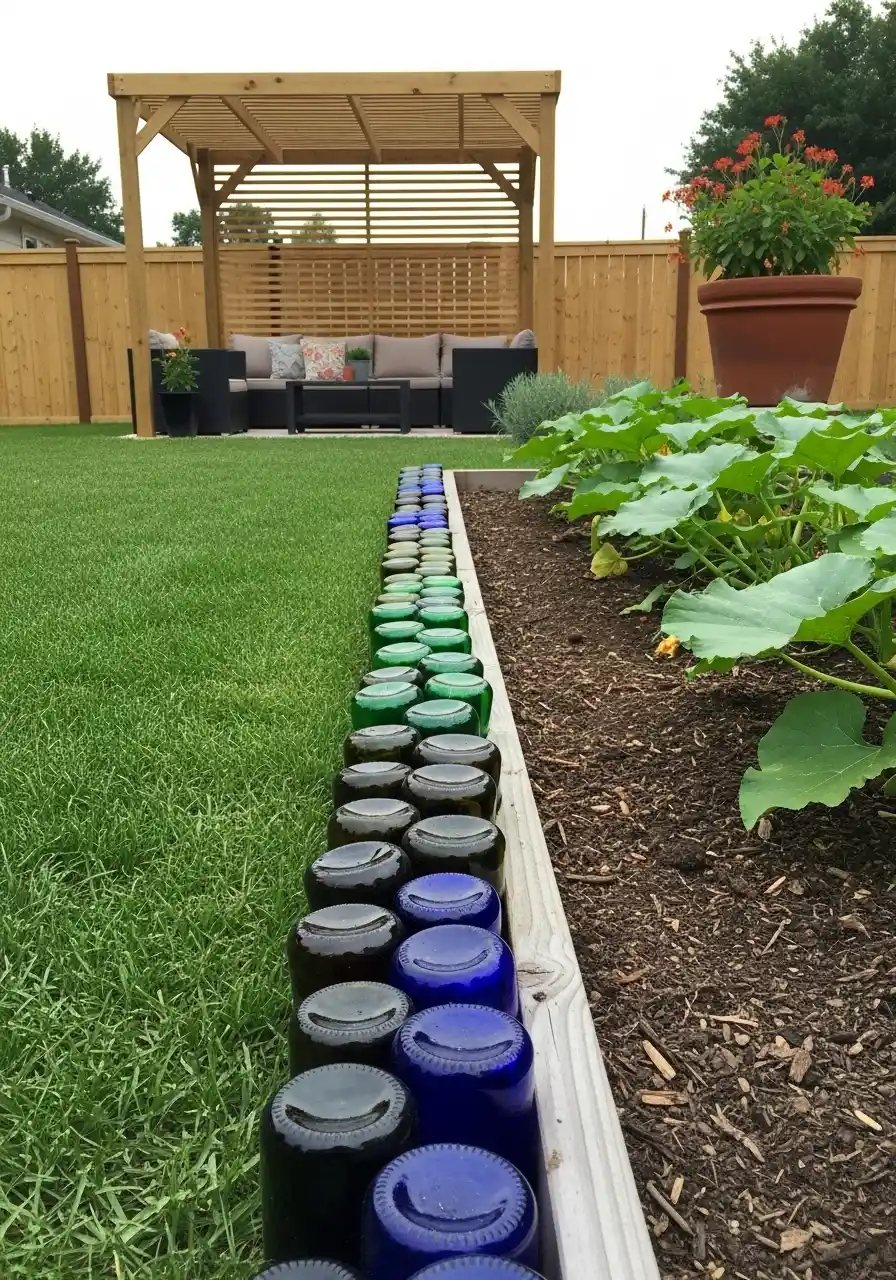
This one shows the bottoms of the bottles, like blue and green circles in a line. It’s simple but it looks so satisfying. The bed is straight, the grass is clean, and the bottles make the edge feel finished. It’s a wine bottle edging idea that’s neat and practical.
To copy it, dig a straight trench and use a string line. Put the bottles upside down and pack soil tight around them. Really tight. If you leave air gaps, they’ll loosen over time and start leaning like they’re tired.
This style also works great for vegetable beds because it’s low and won’t shade plants. And it gives you a clear boundary, which helps me stop “accidentally” planting too close.
Sunset border with mixed bottles, flowers, and stones
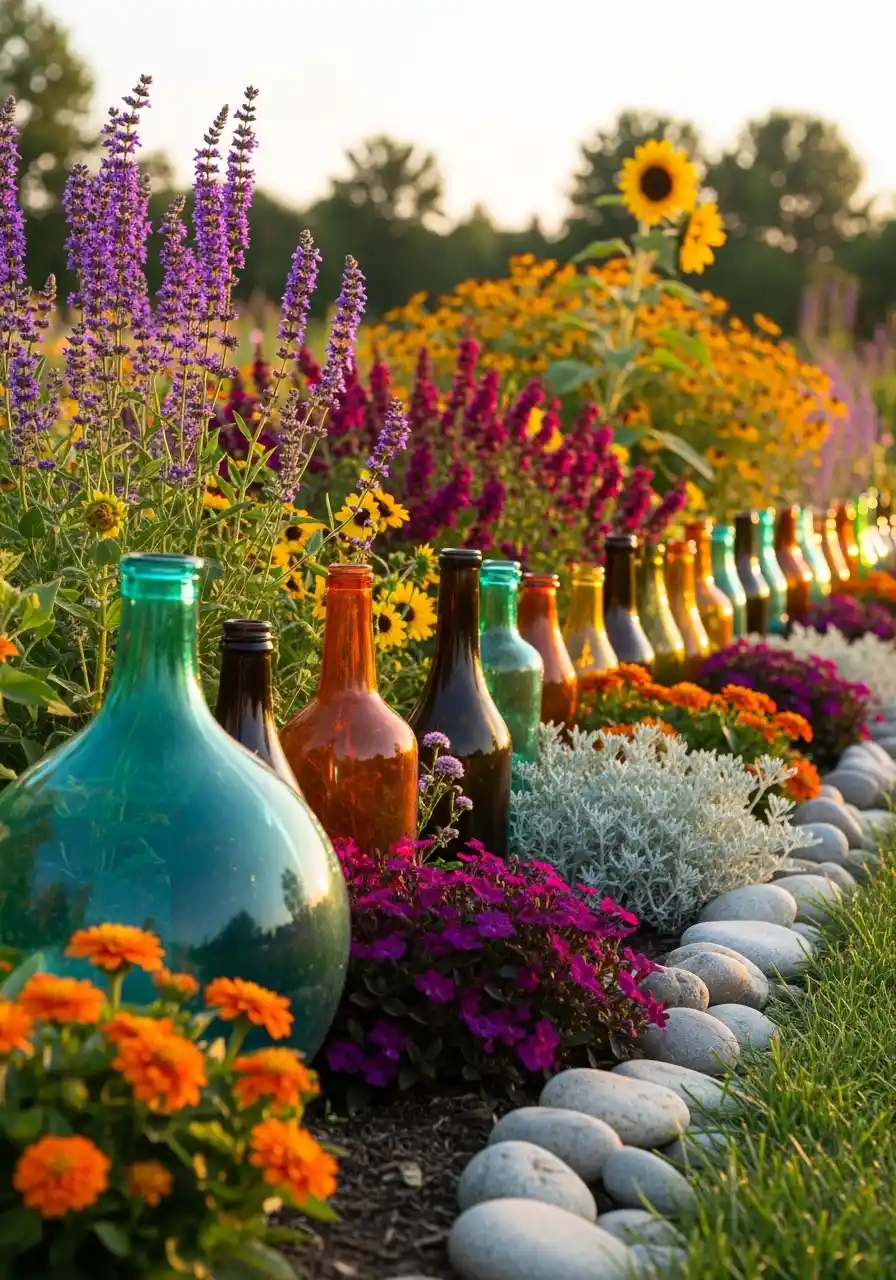
This one is pure mood. The bottles are different sizes and colors, and the stones create a soft edge line. The flowers are bright and wild, and the whole thing glows in warm light. It’s imperfect in a beautiful way, like it’s not trying too hard.
If you like a more relaxed bottle garden edge, don’t stress about matching bottles. Mix them. Mix shapes too. Just keep the line consistent so it still reads as a border, not random glass stuck in dirt.
I’d keep taller plants behind the bottles so they don’t get hidden. Bottles are cute, but if you bury them in leaves, what’s the point, you know?
Curved bottle border around a flower bed
This image is a good reminder that curves make everything feel softer. The bottles form a smooth curve, and the bed flows like it belongs there. A curved wine bottle garden border is also forgiving. If spacing is slightly off, people don’t notice as fast as they do on straight lines.
For this, I would lay out the curve with a garden hose first. Then dig a trench along the hose line, maybe 4–6 inches deep depending on bottle size. Push bottles in, step back, adjust the curve, then pack soil.
Also, mulch helps a ton here. Dark mulch makes glass stand out and look cleaner. Light mulch can make it all blend together.
Mixed recycled borders with bottles plus painted elements
This last idea is more “use what you got.” There are painted bottles and bold recycled pieces, and it creates a bright little garden corner that feels cheerful. It’s not subtle. It’s loud, playful, and honestly kind of brave.
If you’re into this style, pick one main thing to repeat. Like repeating bottle colors, or repeating a shape. When everything is random, it can look messy fast. But when one thing repeats, it becomes a theme.
I also think this works best in a side yard, near a tree, or in a kid-friendly spot. It feels like a happy project, not a formal garden rulebook.
Colorful ring that turns a tiny bed into a little stage
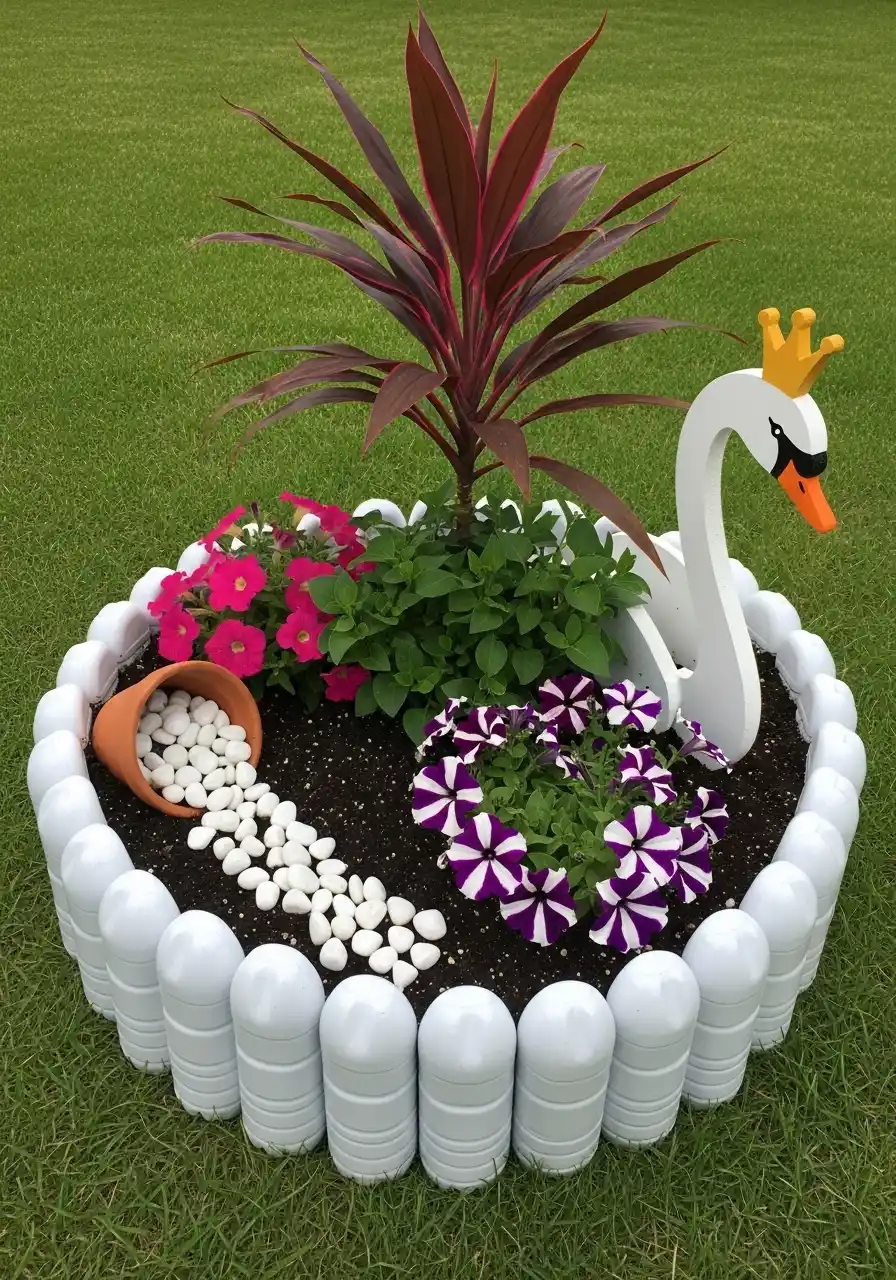
This first idea is a small round bed with a cute little swan planter vibe, white edging, and a tiny “spill” of stones. It’s not all bottles, but it shows the same mindset: borders aren’t just borders, they’re decorations. A wine bottle garden border does that even better because glass catches light and changes during the day. Morning looks soft, evening looks rich.
If you’re doing a circle border like this with bottles, you want consistent spacing so it doesn’t look like missing teeth. I’d dig a shallow trench, set the bottles upside down, and pack soil or gravel tight around them. My hack is using a board laid across the tops to check bottle height. If one is taller, it screams at you forever. A rounded bottle border for garden beds looks best when it’s neat, even if your plants are wild.
Wine bottle garden border: mixing bottles and corks along a walkway
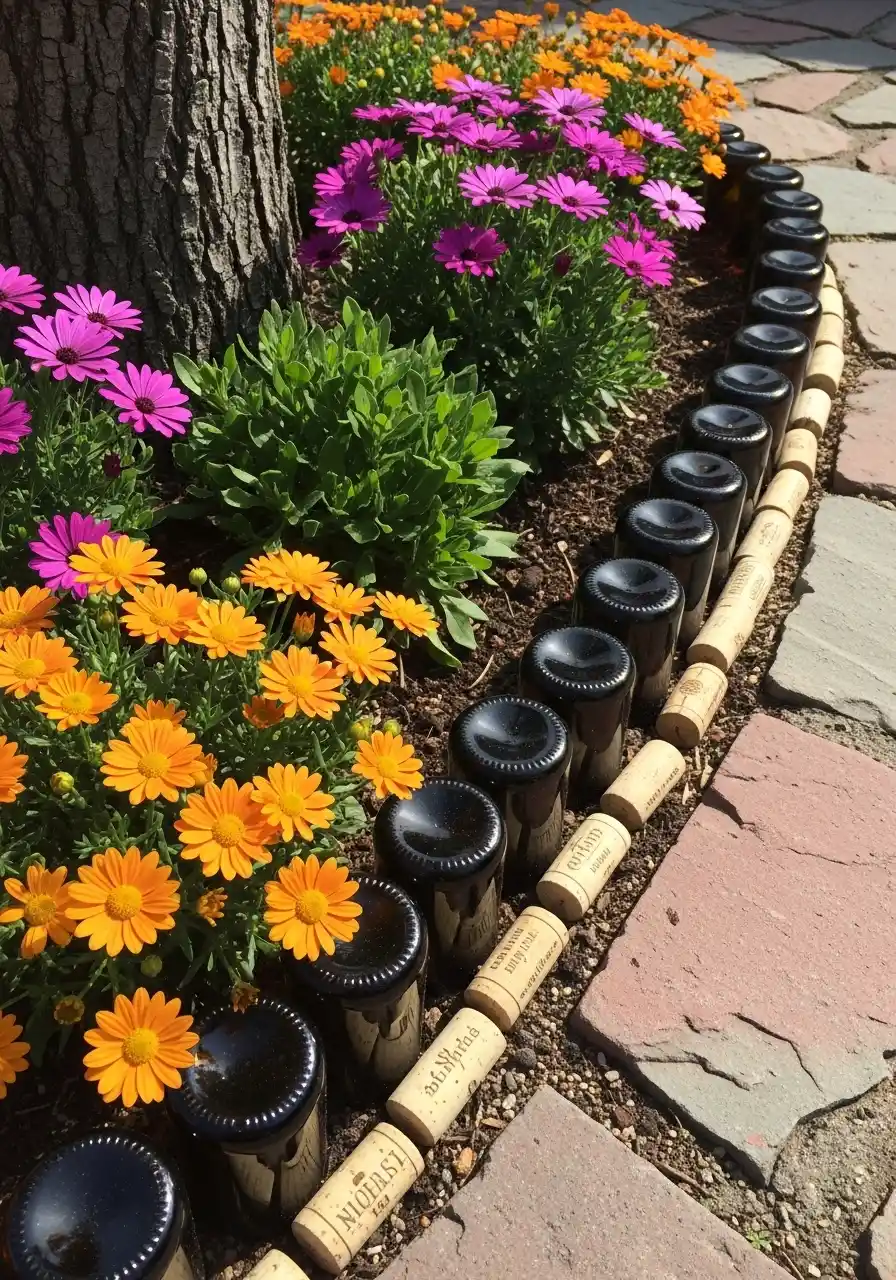
This one is honestly so clever I got mad I didn’t think of it first. Dark glass bottles upside down, lined tight, with a second row of corks right beside them. It’s like a double border, and it looks fancy even though it’s basically recycling. The wine bottle garden border here also acts like a clean edge between soil and pavers, which helps the whole area look finished.
Corks can float away or scatter, so don’t just lay them on top and hope. I’d set them into a thin strip of mortar or even a shallow groove with landscape adhesive. Not perfect, but it works. The bottles should go in deep enough that they don’t wobble when someone steps too close. This kind of wine bottle edging is best where you want a crisp line, like around a tree ring or patio bed.
Tall bottles for a wavy edge around shrubs
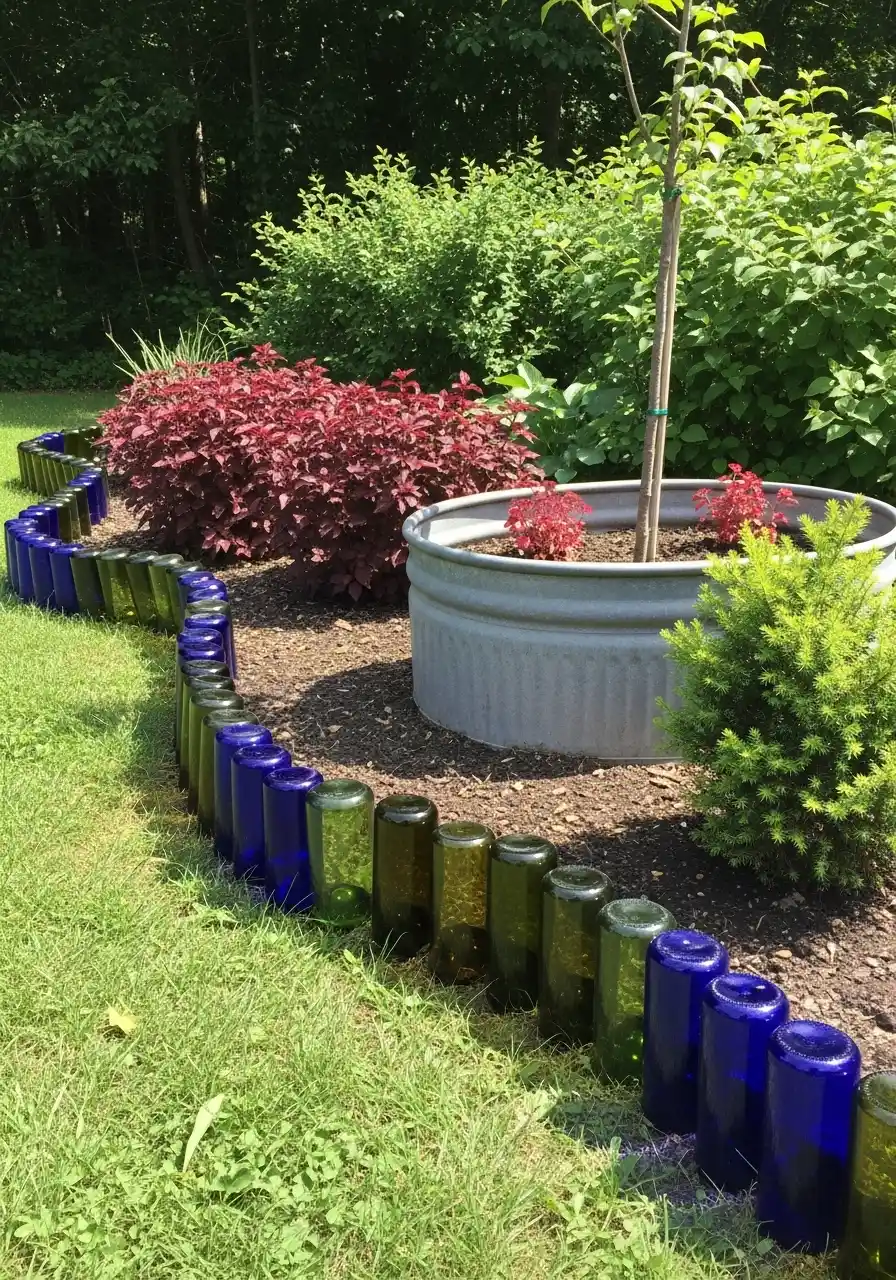
This idea uses bottles like little glass fence posts, curving around a planting area. Blue and green glass together looks super calm, like sea colors. A wine bottle garden border like this is great when the plants inside are mostly green too, because the glass becomes the color pop without screaming.
To make the wave shape smooth, I’d lay a hose down first, then mark the curve. Don’t eyeball it, trust me, it gets weird fast. Dig the trench and tamp the bottom so the bottles sit stable. One tip I swear by: add a few inches of sand or pea gravel at the base, it helps drain water away from the glass and makes it easier to adjust height. This glass bottle garden edging looks best when the line flows, not zigzags.
Rainbow bottle line along a modern house
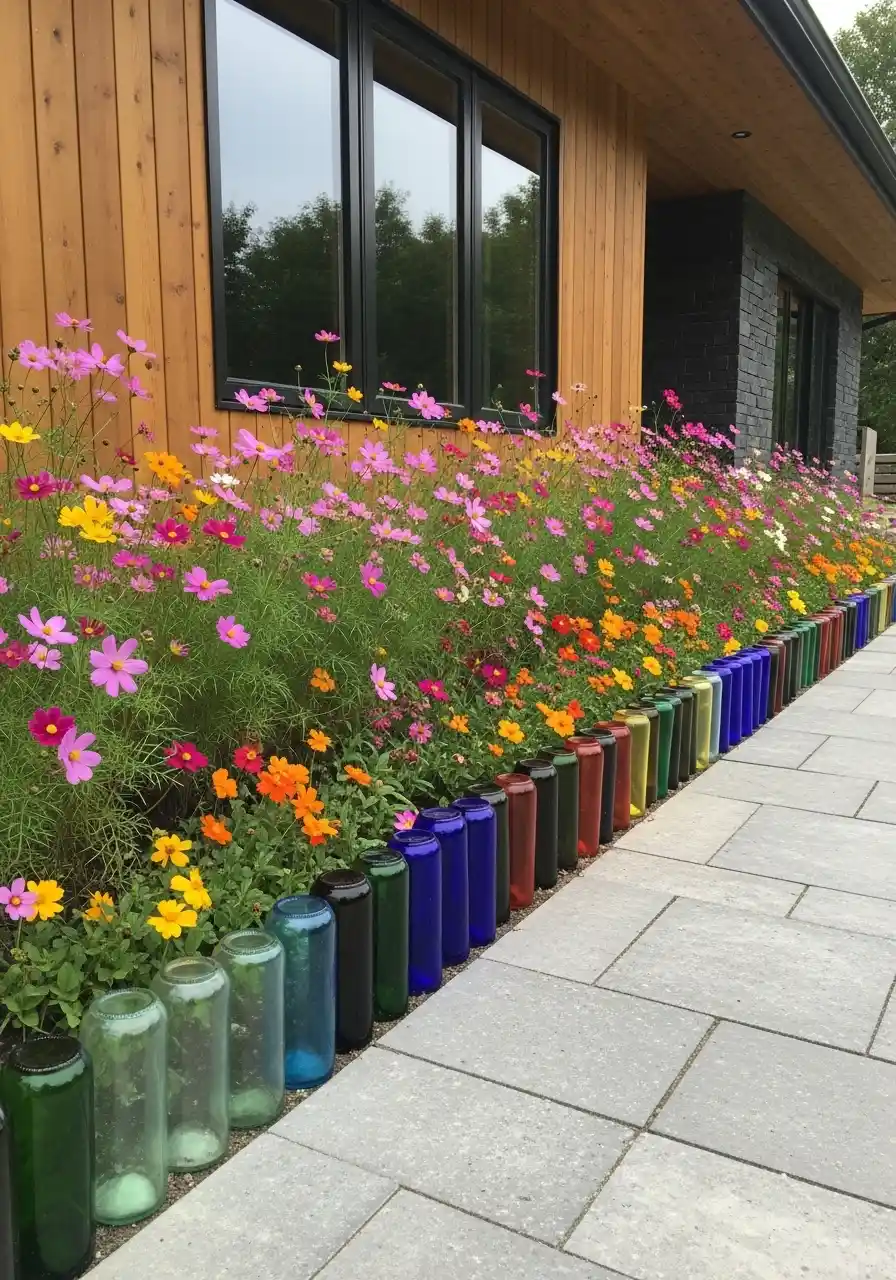
This is the loudest one and I love it. The bottles go in a long row along a walkway, and the plants behind them are airy and colorful, like wildflowers. The wine bottle garden border becomes its own art piece, like a stained-glass fence but lower. It makes the whole side yard feel playful instead of boring.
If you want the rainbow effect, you’ll need to collect bottles on purpose, not randomly. Group similar colors together so it feels like a gradient. Also, you’ll want uniform bottle height or it starts looking messy. I’d stick to one bottle type if possible, or at least keep the necks similar widths. A colored wine bottle border is also safer if you sink bottles deep and keep the bottoms level, so nobody catches a toe on it at night.
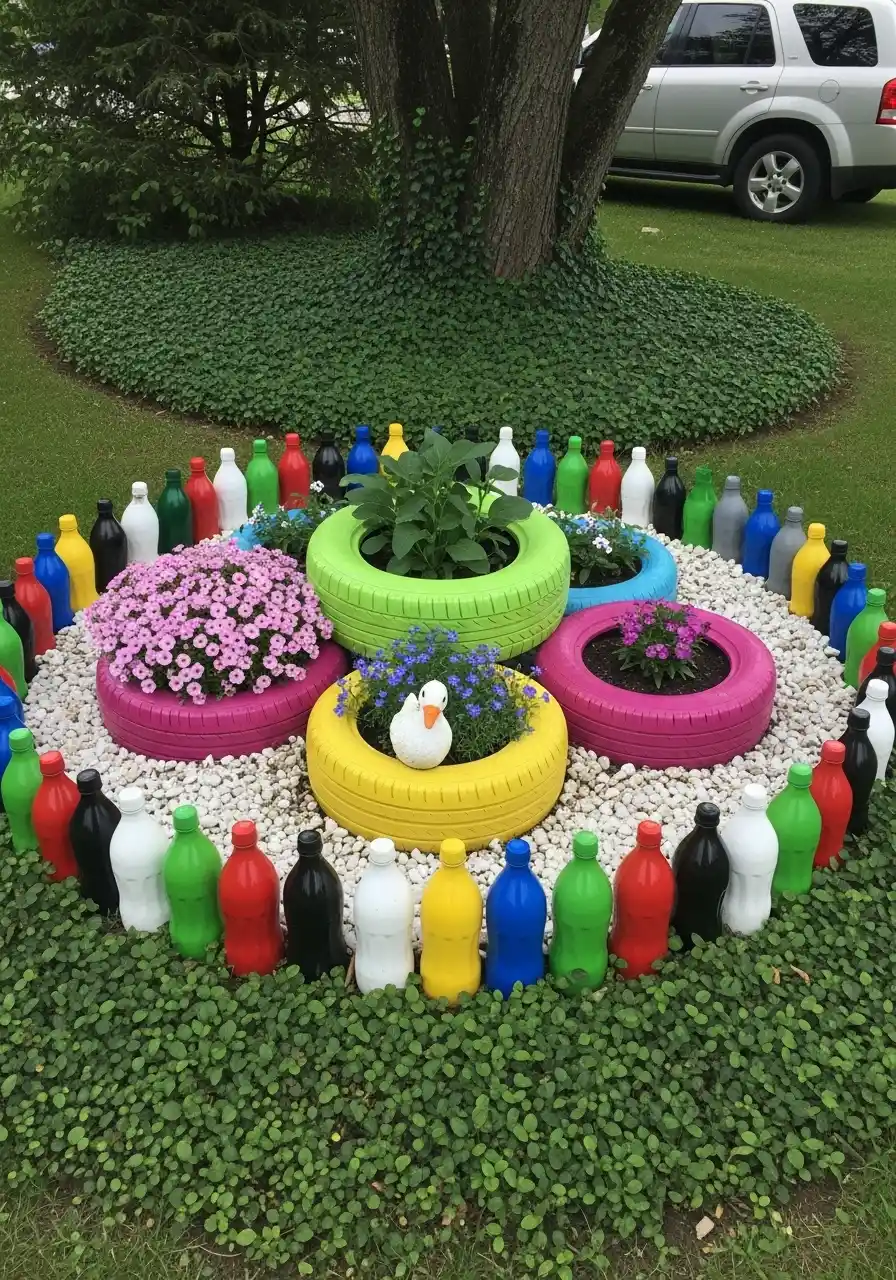
Bottle circle around a flower mound
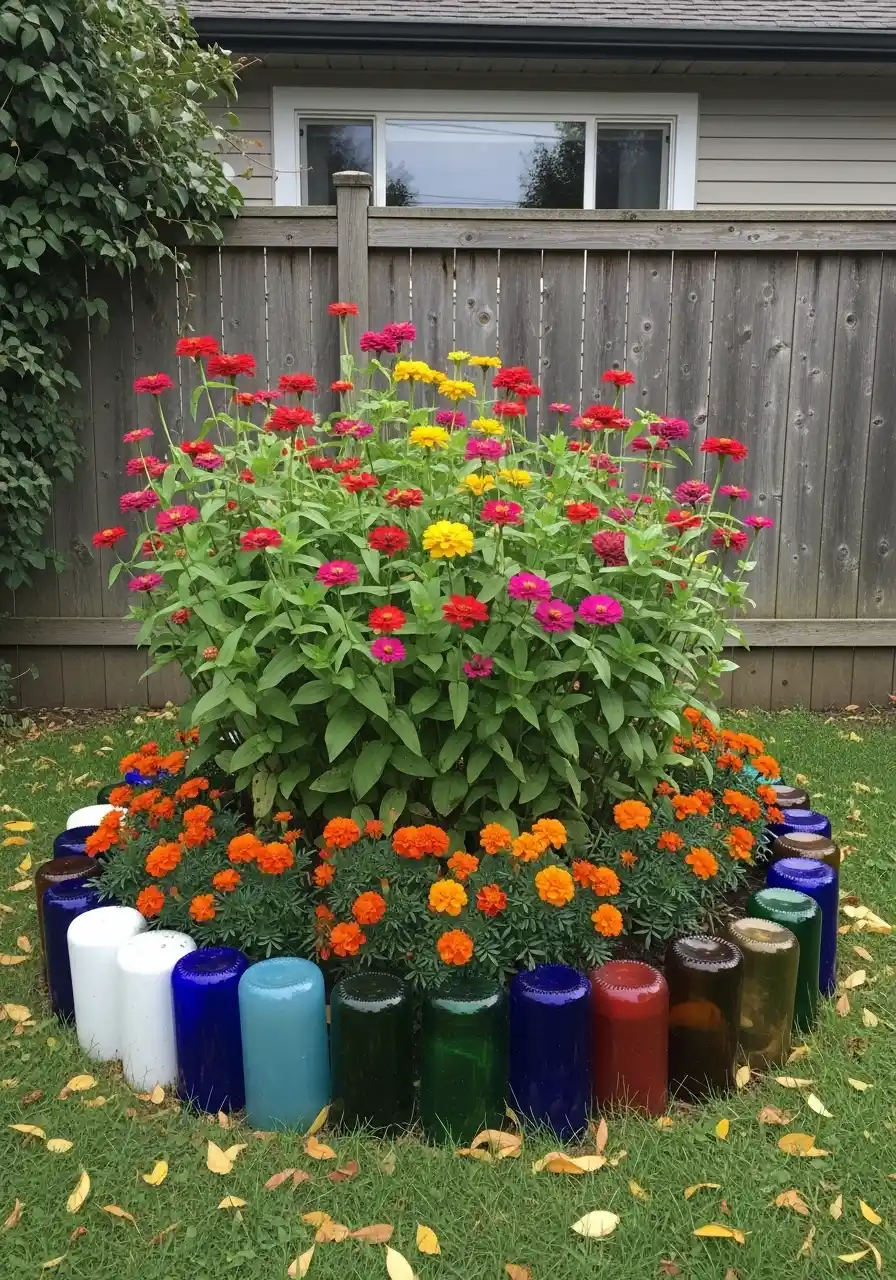
This one is a bold ring around a big mound of flowers, almost like a crown. The bottles are in different colors, and it makes the flower bed look like a centerpiece instead of just “plants in the yard.” A wine bottle garden border works great for a circular bed because it naturally frames the shape.
The big thing here is making it strong. Circular beds get stepped on more because people walk around them. I’d set bottles deeper than usual and pack crushed stone around them for stability. Also, consider using thicker bottles because thin glass can crack easier if the ground shifts. Plant-wise, put taller flowers in the middle and shorter flowers near the edge so the wine bottle border edging stays visible. Otherwise the plants swallow it and you lose the cool part.
Bottle-wall planter boxes for a big statement
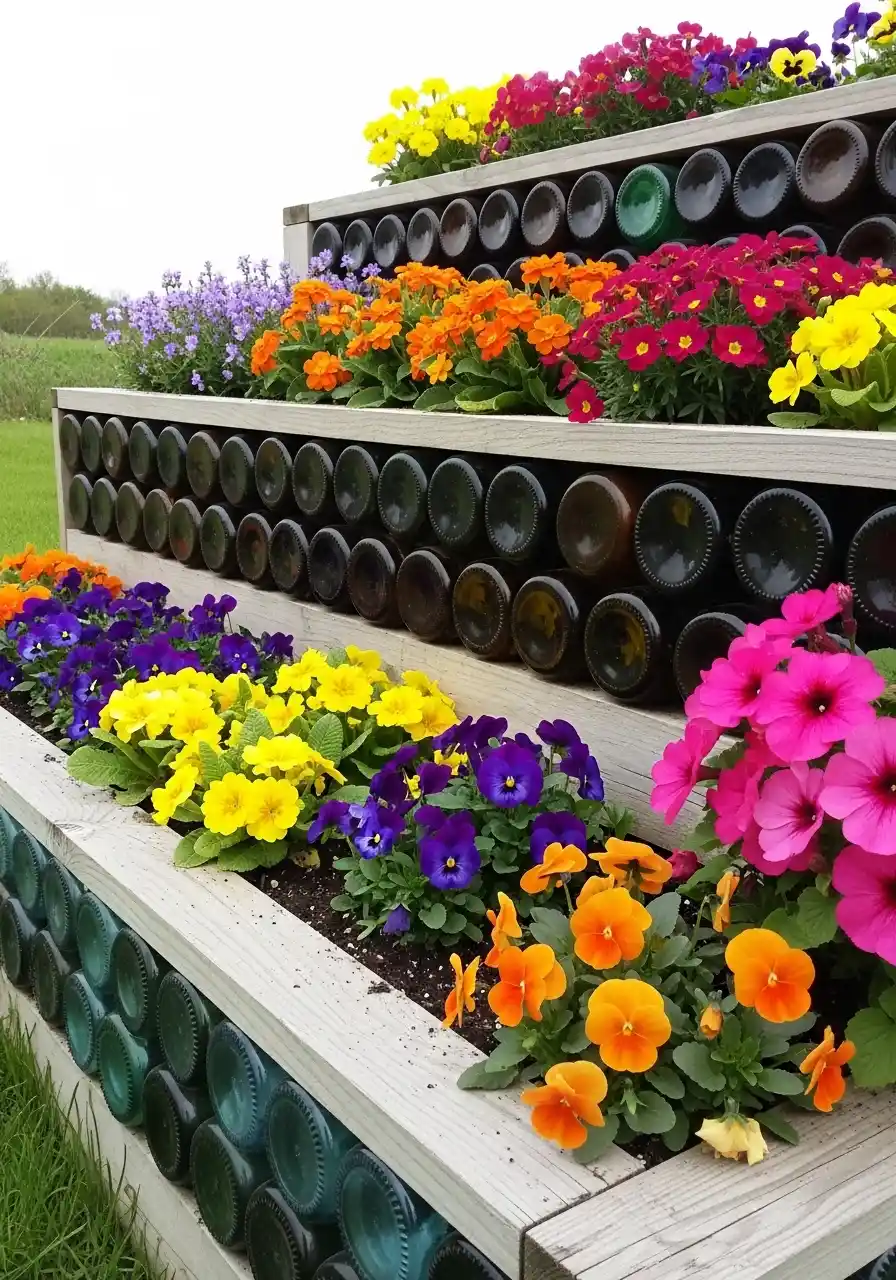
This last idea is kind of next level. It’s not just edging, it’s a whole raised planter built with bottle bottoms showing in rows. It looks like a honeycomb of glass circles. This is a wine bottle garden border turned into actual structure, and it’s honestly stunning when it’s packed with bright flowers.
If you try this, you need a stable frame. Wood boxes with bottles set into openings works better than trying to “stack” bottles like bricks. Make sure there’s drainage, because raised planters hold water if you mess that up. Also, place the bottle bottoms where they catch light but aren’t in direct line for kicking or bumping. This wine bottle garden edging idea is more work, but it gives the biggest payoff, like a garden feature people talk about.
FAQ: wine bottle garden border questions
1) How deep should I bury bottles for edging?
Usually 4–8 inches, depending on bottle height.
2) Do I need corks in the bottles?
Not required, but corks keep dirt and bugs out.
3) Is a wine bottle garden border safe?
Yes, if bottles are intact and firmly packed.
4) How do I keep bottles from leaning?
Dig a trench and tamp soil very tight.
5) Can I use clear bottles too?
Yep, clear glass looks great with stones.
6) What if I only have mixed colors?
Mix is fine, just keep spacing consistent.
7) Will bottles crack in winter?
Sometimes, especially with freeze-thaw and water inside.
8) Should I use landscape fabric?
It helps a lot under gravel or rocks.
9) Can I do curves with bottles easily?
Yes, bottles are great for gentle curves.
10) How do I clean bottles for the border?
Soak labels off, rinse well, let dry fully.
Conclusion
A wine bottle garden border is one of those simple ideas that makes a garden feel personal. It can look polished and neat, or artsy and wild, depending on how you line it up. I like that it’s recycled, a little quirky, and not pretending to be perfect. Honestly, my yard isn’t perfect either, so it matches.