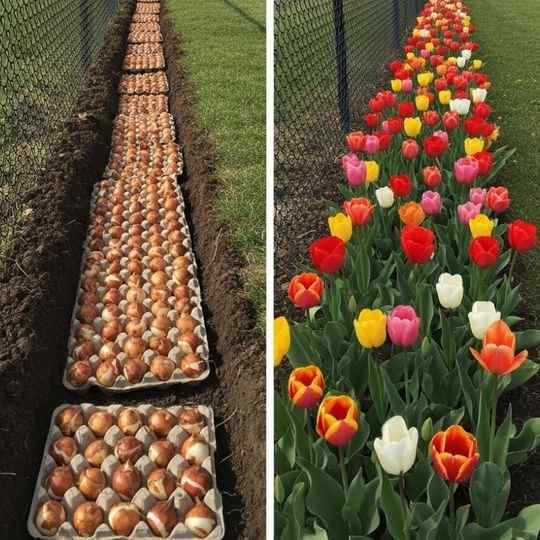
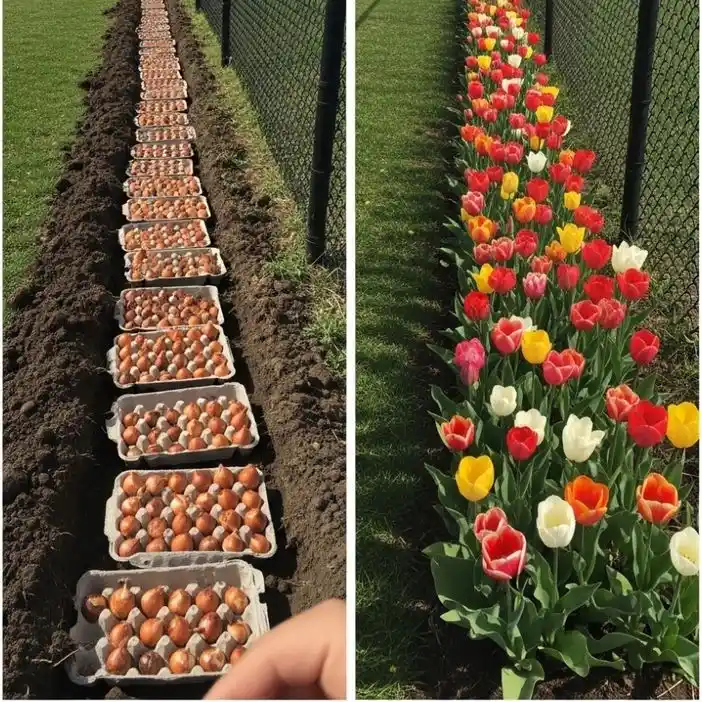
Planting bulbs in straight, evenly spaced rows sounds simple—until you’re out in the garden trying to keep depth and spacing consistent while planting dozens (or hundreds) at once. A quick, practical fix is to use recycled cardboard egg cartons as a spacing guide inside a trench. This approach is cheap, tidy, beginner-friendly, and eco-conscious, and it helps you create uniform flower beds without measuring tape or complicated tools.
Below is a complete, streamlined guide to how the egg carton trench method works, which bulbs suit it best, and how to get strong, reliable blooms.
Table of Contents
How the Egg Carton Trench Method Works
This technique combines two things that make bulb planting easier:
-
One long, shallow trench to keep planting depth consistent
-
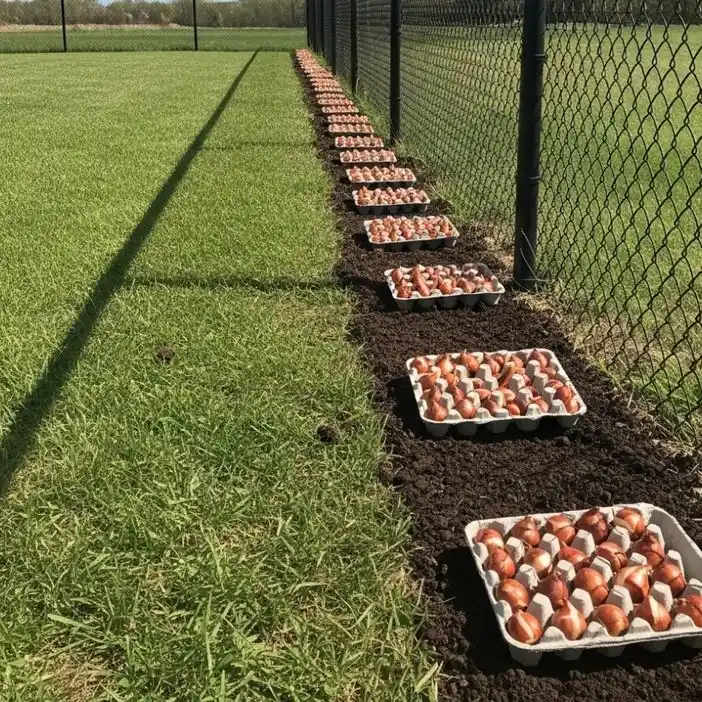
Cardboard egg cartons to keep bulbs evenly spaced and upright
Egg cartons act like biodegradable planting trays. Each cup holds a bulb in place so it doesn’t roll, tip, or shift while you’re planting. Over time, the cardboard breaks down in the soil and adds a small amount of organic matter.
Step-by-Step: The Basic Process
-
Dig a straight trench at the correct depth for your bulbs.
-
Set empty cardboard egg cartons in the bottom of the trench (lid removed if needed).
-
Place one bulb in each cup, pointed end up.
-
Backfill with soil until the trench is level.
-
Water thoroughly to settle the soil and kick-start rooting.
That’s it—consistent spacing, consistent depth, and a clean, organized layout in a fraction of the time.
Why This Method Works So Well
The egg carton trench method has several advantages, especially for large plantings:
-
Perfect spacing with no guessing or measuring
-
Uniform depth, so bulbs emerge more evenly
-
Faster planting, ideal for borders and mass displays
-
Eco-friendly, since cartons decompose naturally
-
Less bulb damage, because bulbs stay stable and upright
-
Neat, professional-looking rows that are easy to maintain
Bulbs That Work Best With Egg Cartons
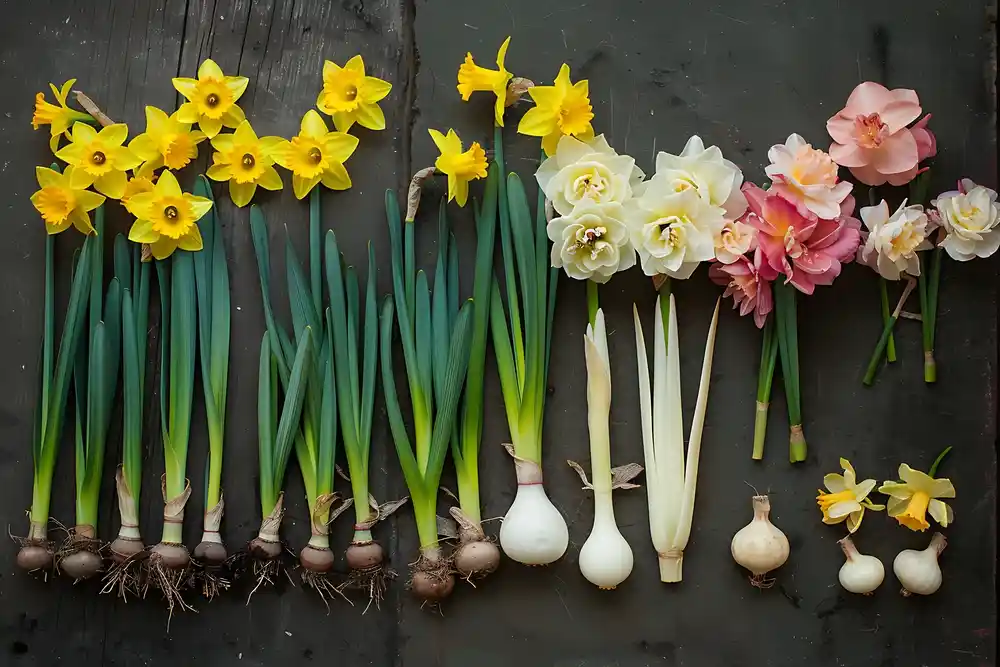
Most small to medium bulbs are ideal for this method. If a bulb fits comfortably in a carton cup, it’s usually a good candidate.
Spring-Blooming Bulbs
-
Tulips – dependable when evenly spaced
-
Daffodils (Narcissus) – hardy and long-lived
-
Crocus – small bulbs that fit perfectly
-
Hyacinths – compact and fragrant
-
Grape hyacinths (Muscari)
-
Snowdrops (Galanthus)
-
Scilla (Siberian squill)
-
Anemone blanda
-
Iris reticulata
Summer-Blooming Bulbs
-
Gladiolus
-
Freesia
-
Ranunculus
-
Ixias
-
Dwarf lilies
Skip very large bulbs (like giant alliums or large decorative lilies) since they often need deeper planting and wider spacing. Those are better planted individually.
Choosing the Right Egg Cartons
Use only cartons that will break down safely in soil.
Use:
-
Plain cardboard or recycled paper cartons
-
Uncoated, non-glossy cartons
Avoid:
-
Styrofoam
-
Plastic
-
Wax-coated or heavily treated cartons
Optional: poke a couple of holes in the bottom of each cup for drainage, but it’s not strictly necessary in well-draining soil.
Planting Depth: A Quick Guide
A reliable rule for most bulbs is:
Plant bulbs at a depth of 2–3 times their height.
Here are common examples:
-
Tulips & daffodils: 12–15 cm
-
Hyacinths: 10–12 cm
-
Crocus & muscari: 6–8 cm
Dig your trench to match the bulb type you’re planting before you place the cartons.
Tips for Stronger, Healthier Blooms
1) Start With Quality Bulbs
Choose bulbs that are:
-
Firm
-
Dry and intact
-
Free of mold
-
Not soft, shriveled, or bruised
Weak bulbs almost always produce weak growth.
2) Plant at the Correct Time
-
Spring-blooming bulbs: plant in autumn
-
Summer-blooming bulbs: plant in spring after frost risk passes
Many spring bulbs need winter chilling to bloom well, so timing matters.
3) Improve Soil Before You Plant
Mix in:
-
Compost
-
Well-rotted manure
-
Leaf mold
Good drainage is essential—bulbs are prone to rot in soggy soil.
4) Position Bulbs Properly
Place bulbs:
-
Pointed end up
-
Root end down
If you truly can’t tell, plant the bulb on its side—it can usually correct itself as it grows.
5) Water Deeply After Planting
Give one thorough watering after backfilling to:
-
settle soil around the bulb
-
remove air pockets
-
trigger root growth
After that, avoid frequent watering in winter unless conditions are unusually dry.
6) Mulch for Protection
A light mulch layer helps regulate temperature and reduce erosion. Good options:
-
dry leaves
-
straw
-
wood chips
7) Don’t Overfertilize Early
Use bulb fertilizer or compost:
-
lightly at planting time or
-
in early spring when shoots appear
Too much nitrogen encourages leafy growth instead of flowers.
8) Leave Foliage After Blooming
Don’t cut leaves down while they’re still green. The foliage feeds the bulb for next year. Remove it only once it turns yellow and dry.
Common Mistakes to Avoid
-
Planting bulbs too shallow
-
Using plastic or coated cartons
-
Overwatering during cold months
-
Planting damaged or soft bulbs
-
Using heavy clay soil without improving drainage
Final Takeaway
The egg carton trench method is one of the easiest ways to plant a large number of bulbs quickly—and still get clean spacing and consistent bloom height. With healthy bulbs, correct planting depth, and well-prepared soil, this technique can produce dense, uniform, professional-looking flower beds year after year—without measuring, fussing, or redoing crooked rows.