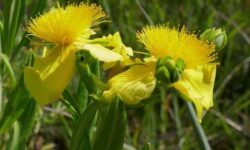
Nothing brings freshness to the soul more than a flowery sight of a garden. You may feel like the aroma from these flowers is taking you away from the worries and hurries of life and you’re landing into your dreamland of colors. That’s why it is said: Grow flowers and decorate your soul as well as a garden. What if these flowers are roses?Wow! King Of Garden!
If there are no roses, your garden would be a kingdom without a King! And you know choosing a king is not as simple as one may think. Similarly, growing roses is not as simple as you think. But we promise, if you stay with us till the end you can figure out the easiest ways of growing roses from seeds.
Carefully read, how to grow roses from seeds? There are three methods of fertilizing roses from seeds. The first method is to grow roses after collecting seed from the rosehip is relatively longer. However, the vermiculite method and sowing seed directly in the pot are easier. The above methods include collecting seed, passing through stratification, and then planting in soil or pot.
No need to say that water and sunlight are necessary for the successful germination of the rose plants. This process may take the time period of 2 to 3 years but it can less or more depend upon the kinds of flowers and the climate in which you plant them.
To have a complete guide for Rose Seedling read this article with great care.
Let’s dive into it.
Table of Contents
How To Grow Roses From Seeds
There are different methods used for planting rose. Some are long and need patience. But there are some easy and short methods also. Here in this article, we are going to discuss all possible methods long or short, hard and easy, in detail.
The first method is relatively longer and good for professional growers. This method involves collecting seeds out of rosehip. To carry out this procedure you may need the following item. And next to the item list there is a step by step guide of growing seeds procedure.
Have a look at the below list and procedure:
List Of Things You Need
You may need the following accessories during the plantation of roses:
- Small Scissors
- Clean Brush
- Labels with string
- Shar Knife
- Paper Towel
- Water
- Refrigerator
- Small Bottle with Cap
- Large Coin Envelop
- Bleach
- Cup
- Marking Pen
- Hydrogen peroxide
- Plastic bags
- Cutting board
- Alcohol
- Cotton buds
- Plastic spoon
You must take all these things with you while planting so that you may not face any difficulty and delay in your work.
1. Steps Of Growing Roses Through Rosehip
Basically, planting roses is not an easy process as you think. It can be long and tough. However, your success rate can be very small because there are more chances of failure of seed germination. So you have to be patient and wait until your efforts bring fruit.
This method is usually used by professional breeders who grow roses at long scales. The basic steps for this system are mentioned below:
- Typically, flowers are pollinated by themselves or by insects. They have bisexual because they have both male and female parts. Leave the flowers on the rose plant. After withering small fruits known as Rosehips will develop in their place.
- The rosehips change their color while reaping. They completely grow when they are in red, orange, purple, and brown color. Now remove the rosehip with sharp scissors from the bush and wait until it becomes dry but not completely.
- Cut the rosehip with the help of a sharp knife and put out the seeds through the tip of the knife.
- If the pulp of rosehip remains on the seeds wash them carefully. Put these seeds in a sieve and run water through it to make them clean. The pulp may prevent them from germination.
- Take 1.5 teaspoons of hydrogen peroxide and mix it in one cup of water. Keep these seeds in this mixture for one hour. This can reduce mold growth in seeds. The alternation of this step is the light dust of anti-fungal powder for plants.
- Typically, rose seeds need a cold and wet atmosphere for sprouting. So place the seeds between two lightly wet paper towels or in vermiculite.
- This process is called Stratification. If you have bought seeds from a store, you don’t have to do this process because they have already go through this method.
- Now put these seeds in a plastic bag with the seedling tray and keep them in a refrigerator. That area should be empty from fruits and vegetables because they prevent the seeds from germination. Make the towel wet with a dropper if you find it dry.
- When the seeds start to germinate, which usually occurs in spring, bring them out from the fridge. They will not sprout until you plant them outside at 70 degrees. The process may take four to sixteen weeks to germinate depending upon the kind of rose.
- Now the step of plantation starts. A small seedling tray can be helpful to care for several seeds at a time. If you don’t have such trays use plastic cups with a hole in the bottom. Do not use regular soil as it is not well-drained and cause the seedling to rot.
- If you bought seeds from the store plant them at once. But the seeds that you germinate yourself as mentioned above, plant them as they begin to sprout. Put the seeds in the tray and cover them slightly with the soil about ¼ inch deep. The space between seeds should be at least 2 inches. The seeds that have not been stratified may take 2 to 3 years to emerge.
- Keep the soil wet but not soggy. The ideal temperature for this process is about 60 to 70 degrees for all varieties of roses. The seedling needs 6 hours of sun each day but it also depends on the parent rose variety.
- The first two visible leaves are called Cotyledons. When several true leaves appear, it is time for transplanting. It is easy to transplant them to a large pot then outside. It is the best time to transplant them outside when you notice roots encircling the container.
- Give a half-strength fertilizer and be sure about the presence of plenty of light once the seeds start to grow. A grow light system is suitable for the rose propagation process.
- This is the final and important step as the reward for your hard work comes near. When the transplanted seedling looks healthy, water them as normal. Fertilizing a few times in the warm growing season when your plant grows and blooms.
- The fungicide will help to keep fungal diseases from attacking the rose seedling. Do not overwater the rose because it is the major cause of its destruction.
This process may take some time but be patient. Your efforts definitely would be rewarded. You can buy ready to sow rose seeds if you find it difficult to collect from rosehips.
Note: keep one thing in your mind that some varieties of roses will not bloom during their first year.
In the above discussion, we have learned all about the growing roses in detail. But that is a long and difficult process as some of us have not enough time and facilities to adopt it.
So there are some other methods also which we can follow easily. Four easiest ways of planting flowers are mentioned below:
2.Vermiculite And A Baggie Method
In this first step, take a handful of barely-damp cobalt into a small clean plastic bag. The cobalt should not be wet well but dry also. Write the name and date on a label with permanent marker Put the label and seeds into the baggie and put it into the refrigerator. Mark the date for 90 days on the calendar.
After 90 days take the bag out of the fridge and sow the seeds into a pot. Label each pot and you will see germination in a week. This process may continue for a month.
After seeing 4 to 6 leaves, transplant the seedling into their flower pot and grow on until they are ready for planting outdoors.
Note: It is not necessary that all the seeds will germinate. Throw out the rotten seeds pot.
3. Sowing Rose Seeds Into Pot System
The second method of germination is to sow seeds into pots directly that are full of soil. The soil should be sterilized. If you have an open bag, take a kettle of boiling water and pour it slowly on the soil with the help of a bag to make it sterilized. Through this, there will be no fungal problem.
The seed should be barely covered and not planted deeply. Firm the soil after plantation so that the covering of soil remains in contact with the seed. The door screening is important to keep the seed safe from mice and ants.
Put these pots outside in a protective location. Leave them there till spring. During spring, you can take the flat inside and heat it up a little. When the seeds have germinated, repeat the process of transplant mentioned above.
You can use the same pot for two seasons.
4. Alternative Method
Here is another method used as an alternation of the above two systems. In this system, we have to cut the bottom of a large nursery container and plunge it into the ground so that only the top of the container remains outside. Sterilize the soil in the pot by pouring many kettles of boiling water. Sow the seed and cover it with sterilized soil.
This process may take the time of two years and you can remove the seedling after appearing of 4 to 6 true leaves. Transplant them into pots and later on into the garden when large enough.
After two years you can dig up the garden and sterilize it again. You can also start fertilizing some other seeds in it.
Give a half-strength fertilizer and be sure about the presence of plenty of light once the seeds start to grow. A grow light system is suitable for the rose propagation process.
How To Grow Roses From Dry Seeds
If you are a flower lover and interested in gardening, you must know about planting flowers. There are different ways of the plantation. One is through dry seeds.
Whenever you grow roses, you should always try to develop varieties of roses in your garden.
However, each process of the seedling will surprise you. Before plantation, rose seeds have been collected in fall, clean, and cold treated. The cleaned seeds look dry but they are moist inside.
Growing roses from dry seed are a step by step process. At first, you will have to prepare the flower for pollination. Next pollination will take place and ultima
5 Steps To Grow Roses From Dry Seed
If rose seeds are completely dried, there is no possibility of growing up. So rose seedling is not allowed in the open air.
Here are some steps to grow rose from seeds:
Step-1: Preparation Of Flowers For Pollination
Pollination of the rose flowers depends upon the honeybee, native bees, and bumblebees. Rose flowers can be pollinate carefully. You can choose your favorite type according to color and fragrance.
Choose a female flower through which you can get seed cover. Remove the petals and find out stamens. After that cut off stamens with small scissors. In this way, planned pollination will be available for other flowers.
Put the stamens in a clean and small bottle. Label it with a rose name using a permanent pen. Store it in a cold dry place that is away from sunlight. It should be uncovered.
Now choose a parent flower, remove its petals, and reap the stamens.
Check it to see that if a yellow, mature pollen is producing or not. If it is done, the process of pollination has started. But if not, look at the stamens daily in the bottle. When the yellow-colored pollens come out of the stamens, you can use them for pollination.
Step-2: Pollination Process
Collect all pollen from the bottle of harvested stamen with the help of a paintbrush and transfer them to the pod parent flower. Clean the brush with alcohol and make it dry.
Repeat the above process after four hours and again in eight hours. Shake the bottle to get more pollens if needed. Tie a tag around the flower with the parent’s name.
Step 3: Seed Collection
It takes at least four months to develop the fruit of rose on a plant. After ripening, cut them off and tie a tag of the seed pod. Store each seed pod in a refrigerator packed in a coin envelope to make crisper for several weeks. Take the ripened rosehip, place it on a cutting board, and cut it half with a sharpened knife. Remove the seeds with the tip of the knife and put them in a cup. Make sure all this process should be done in a clean atmosphere.
Use weakened bleach to get rid of bacteria and fungus from seeds. Mix two spoons of bleach into a bottle of water and mix the seeds with a plastic spoon. Rinse the seeds and use enough water to remove the bleach solution.
Put the seeds again into a clean cup and cover them fully with hydrogen peroxide. Remain them in it for 24 hours and then rine them with clean water.
Step-4: Cold Treatment
Take a shallow bowl to mix half bottle of water and half of hydrogen peroxide. Damp the thick paper towel with this mixture to avoid the mold growth of wrapped seeds in this paper.
Place the seeds in that paper and fold the towel around them. Put it in a plastic bag and keep it in the refrigerator for 45 to 60 days. Check it to know if the towel needs more moistened or not.
Step-5: Planting
Plant seeds below the solid surface of the garden in ¼ inch. Water them properly. Label each pot with the name of the rose. Place the pots in the garden where they can get indirect light easily.
The soil must be moist but not soggy. Keep watching the germination. Put seedlings in large size pots as roots may fill small container size. Get rid of the weak and unhealthy growth of plants.
You have to wait for one or two years to see the first flower.
Related Articles: How Long Does Celery Last?
How Long Does It Take To Grow Roses From Seeds
If you are going to grow roses from seeds, you must have an idea of the time period in which they grow fully to rose. The duration depends upon the different kinds of roses. There are a large number of kinds of roses. Here is the table of names of some roses and their time to mature and fill in.
Table of Different Roses with Names and Blossom Time:
Names of Roses | Time Period to Grow |
Modern Garden Roses | 3 to 4 years |
Climbing Roses | 3 to 5 years |
English Roses | 6 to 8 weeks |
Floribunda Roses | 6 to 8 weeks |
Grandiflora Roses | 6 to 8 weeks |
Groundcover Roses | About 6 months |
Hybrid Roses | 6 to 8 weeks |
Miniature Roses | About one year |
Polyantha Roses | 6 to 8 weeks |
Rambling Roses | 3 to 5 years |
Shrub Roses | 6 to 8 weeks |
Old Garden Roses | 3 to 6 weeks |

How Hard Is To Grow Roses From Seeds
The process of growing roses from seeds is the most challenging task for garners. Because the majority of seeds that you have collected won’t often germinate in spite of all your efforts. Fortunately, there is a large number of rose plants that can produce many seeds inside the rosehip.
So, If you think it an easy thing to do then you are wrong. Usually, there is a possibility to become fail in getting achievement in your task. Your flowers will be destroyed before sprout if you will show any mistake in the process of the seedling.
So, be careful during plantation and follow all the steps mentioned above.
How Do You Get Rose Seeds From Roses
Before harvesting a rose you must know how to get rose seeds. Usually, pollination may occur by bees or wasp, but the rose breeders can control the pollination perfectly as they know better about the parent rose.
When we know how to get rose seeds from a rose, we can grow them and enjoy this amazing experience gifted by mother nature.
After the growth of rose hips, cut them carefully with sharp scissors or a knife and take out the seeds. Place them in a container and label the name of the flower from which they are taken. Once you have collected all the seeds from rosehip, rine them all to remove any kind of pulp from them. Now you can use them for plantation.
This video may help you to collect seeds for roses.
Bottom Lines
At the end of this amazing story of How to grow roses from seeds? You clearly understand the methods of the plantation of roses. Hopefully, this article may cover all essential systems and tools which will be helpful for a professional rose breeder as well as for home-based gardens.
If you succeed after following these ways, celebrate your success and leave a comment below in the comment section and also share your experience with your friends and rose lovers.